Radiant receipts: Defining expressions
Counterpoint's Receipt Editor allows you to define Visual Basic expressions for the data fields and other controls on your receipts and other Point of Sale forms.
An expression is a sequence of logical operations that Counterpoint can evaluate to determine the value that appears in a control and whether a control appears on the printed receipt. Expressions are powerful and flexible tools, allowing you to combine multiple fields into a single control, specify formatting rules for fields, and define complex conditions to determine a control's Value and Visibility.
You can enter an expression into the Value field or the Hidden field for a control, or you can click the corresponding ![]() button to display the
button to display the ![]() Edit Expression dialog, which allows you to build an expression using a drag-and-drop interface.
Edit Expression dialog, which allows you to build an expression using a drag-and-drop interface.
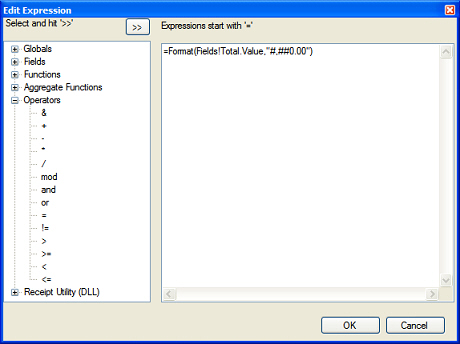
![]() Expressions must always start with the equals sign (=). When you create an expression using the Edit Expression dialog, the equals sign is inserted at the beginning of the expression automatically.
Expressions must always start with the equals sign (=). When you create an expression using the Edit Expression dialog, the equals sign is inserted at the beginning of the expression automatically.
To add a field, function, operator or other element to an expression, select the element from the tree on the left-hand side of the Edit Expression dialog and click the ![]() button.
button.
When you add a function to an expression using the Edit Expression dialog, you must replace the placeholders in the parentheses with the actual parameters (i.e., fields and formulas) you want to use in the function.
Preview a Point of Sale form (by clicking the Preview tab on the Receipt Editor window) after you define an expression to test the expression. If the corresponding control displays syntax errors, edit your expression until it produces the result you expect.
For more information about expressions, refer to http://www.fyireporting.com/helpv4/expressions.php.
Sample expressions
 Data field
Combined fields
Data formatting
Conditional expressions
Converting fields to other data types